To access the Quote dashboard, navigate to the Customer Management dropdown and click Quotes.

After you have created quotes, you will be able to view all of them on this dashboard. You will also be able to see the following information:
- Who created the quote
- When it was created
- The title of the quote
- Which customer it was created for
- The quotes expiry date
- Status of the quote (viewed, expired, new)
To create a quote, click on the green Prepare a Quote button.
On this page, you will create the title of the quote, assign the customer, and set the expiry date. Here are a few suggestions on these items:
-
Title - Make it as specific as possible so the customer knows exactly what the quote will consist of (e.g Quote for M402dn with Supplies)
-
Assigning Customer(s) - You can assign the quote to more than one customer from the company. Keep in mind that the customer must have an account created in order to quote for them.
The last decision to make is whether or not the quote will be a One Time Purchase or Standing Quote. The difference between the two are:
-
One Time Purchase - The customer can only purchase from this quote once. Once they have purchased from the quote, the quote will disappear and will not be accessible to them anymore.
-
Standing Quote - The customer can purchase from this quote as many times as they wish until the quote reaches its expiry date.
After all of this is complete, hit save. Once the system saves, you will have the ability to begin adding products. Keep in mind:
-
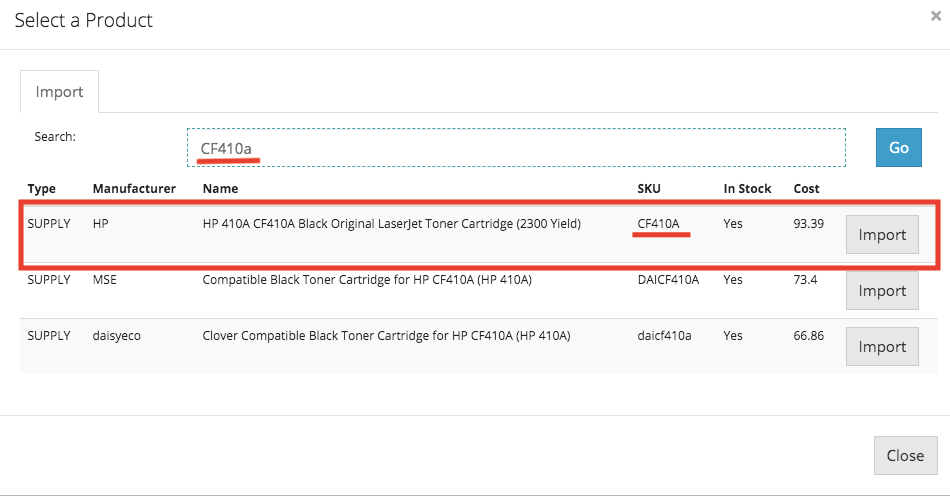
When Adding Supplies - add by the supply’s SKU (e.g CF410A)
-
When Adding Devices - you can add by the device’s model name or SKU (e.g M402dn or C5F94A)


When you find the correct device or supply, click Import. That will add that product to the quote. After that, you will have the ability to set a quoted sell price for that item. You will originally see a Quoted Price based on the price level the customer’s account was set up with, but you can change that price if needed.
Once you have added all of the products and adjusted pricing, the last step is to hit save and then Notify Customer. This feature allows you to create an email to send out to your customers, letting them know that you have created a quote with products they need.
This is what the customer would receive. Keep in mind the branding is for one of our test accounts. Your branding would be applied when using this tool.

All your customer has to do when they receive this email is click Go to my Quote. This will bring them to their quote on your website where they can purchase the products. This is what your customer will see:

Troubleshooting
Customer not receiving your quote email?
- Check spam.
- Send one to yourself—do you receive an email? If so, it may be the customer's email server settings.
Quote screen forwarding to an error screen?
- Make sure you’ve assigned it to a customer before clicking Next.


